A new TIWSHTME post, magnetic polish edition! If you're wondering what that appalling mouthful is, it is my acronym and tag for 'Things I Wish Someone Had Told Me Earlier', aka when I do a post compiling tips on how I approach a certain nail-related action that took me a while to learn. Basically a how-to guide, with things often not mentioned in tutorials. Here we go.

...about using magnetic polishes
- Find the strongest point of your magnet. Mark that end using a permanent marker so it is easy to find. Patterned magnets usually have a marked area to be used already. This can be done by applying your magnetic polish on a swatch stick and rotating your magnet ends / poles to see what reacts the most strongly. The pattern created by the magnet depends on the axis (direction) it has been magnetised.

Bar magnet from Tonic with strongest spot marked in blue
My ring magnet creates a cool circle shape when I hold the flat side parallel to a magnetic surface. - Shake your polish! If it has been sitting longer than 5 minutes, shake it again. It helps the magnetic particles to spread evenly through the bottle.
- Apply thin layer. Cap your nail tip with polish. Let dry fully. An alternative to this is putting down a a black creme polish and letting it dry fully.
- Shake bottle. Apply thicker layer evenly, making sure there are no streaks on surface. This time you do not need to cap the tip - this should help with the streaks. This step should be done as quickly as possible. If the polish needs clean up, save it for later. You are trying to manipulate the magnetic particles in the polish before it dries.

Holding bar magnet diagonally across nail length on swatch wheel
- Hold marked magnet point 8mm - 15mm parallel from nail surface for 60 seconds in your position of choice. You may wriggle magnet slightly around the surface of your nail if you have a strong C-curve so the magnetic pull is distributed evenly.

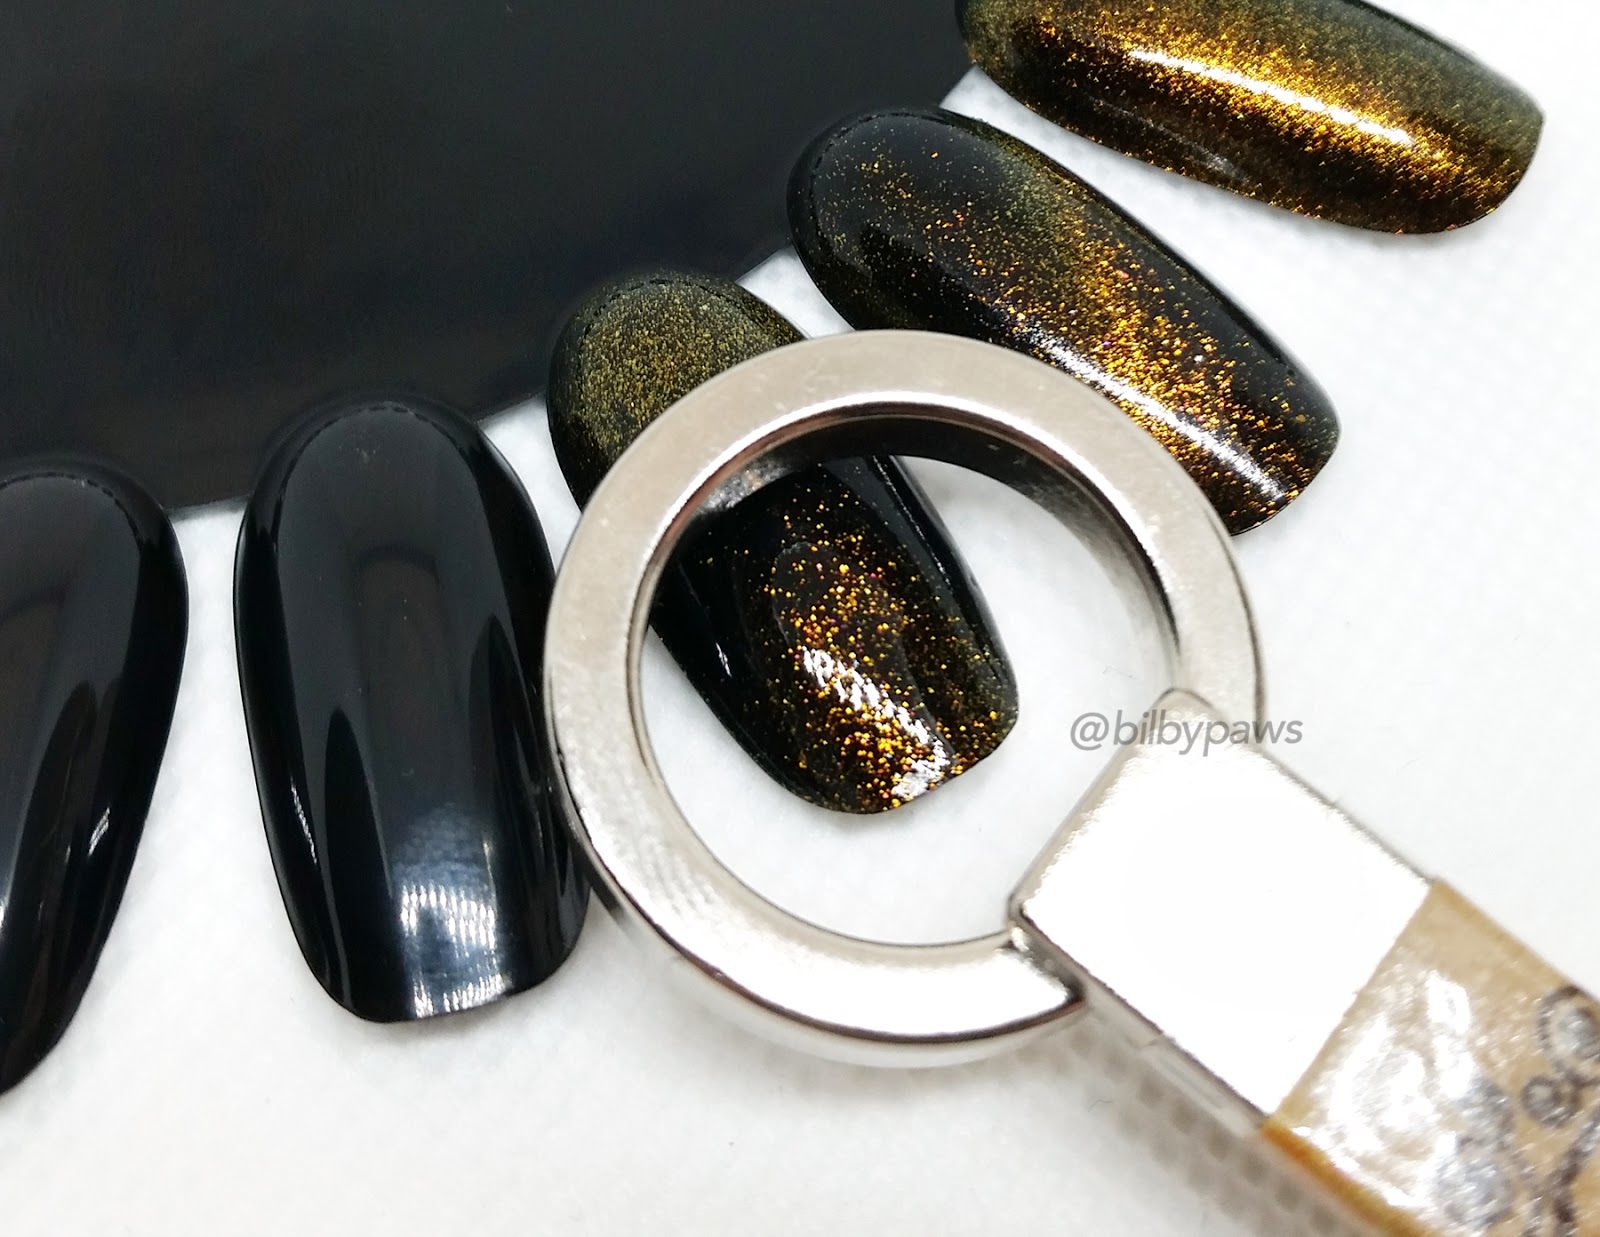
Ring magnet tool with 'handle' created from 2 bar magnets snapped together in use over swatch wheel 
Side view of ring magnet tool. Coloured markings on bar magnets are strongest pull point. - Wait until polish is mostly dry. You can go back at intervals to repeat step 4 (for 10 seconds instead of 60 seconds) to coax back any drifting particles into place.
- Apply a quick dry top coat and repeat step 4 (and 5 if needed). Until polish is completely dry, which can take a few hours, the magnetic particles might continue to drift. A thin first layer and allowing polish to dry as well as possible before top coat helps to aid total dry time.
- Clean up!

 |
| Ring magnet with flat surface marked in blue |
 |
| Pattern created with ring magnet (blue lines mark magnet position) on polish bottle |

Miscellaneous Tips
- If you want to apply a topper like a scattered holo, I suggest waiting until polish is completely dry to do so. Each time you apply a new layer of polish, the solvent in the polish 'melts' the polish below, so when you use a magnetic polish the particles move. This is why I use a magnet after top coat. When a polish is completely dry it is less likely to be affected by a new polish layer.
- Apply polish in steps 4 & 5 one finger at a time. This ensures you have enough time to magnetise each nail properly.
- If you screw up, let polish dry fully and add a new coat and try again. An extra coat can be easier than starting over and getting little sparkle bits everywhere.
- You can tell when a magnetic polish is fully dry when the particles look finer and more dull. The polish surface looks flatter rather than 3d.
- You can use a third hand / soldering tool to position your magnets so you don't have to hold them. Personally I keep knocking into the magnets this way as I have shaky hands, but it works for other people.
- After you have mastered the basics, instead of a first layer of polish or a black creme base you can add any other polish (cremes work best) colour to produce a different final effect. Colours that either contrast or complement the magnetic particle colour work best here. I particularly like using Tonic's Happy Beginnings which is a blue squishy creme.
Different magnets, different shapes
Here are some of the patterns created by different magnets.
Here are some of the patterns created by different magnets.
 |
| Pattern 1: Bar magnet diagonally over the tip of nail |
 |
| Pattern 2: Ring magnet over the tip of nail |
 |
| Pattern 2: Ring magnet over the tip of nail |
 |
| Pattern 3: The round end of double-sided magnet |
 |
| Pattern 4: Wavy lines using patterned nail magnet (#4) Pattern 5: Flower using dual-ended magnet pen |
 |
| Pattern 4: Wavy lines using patterned nail magnet (#4) Pattern 5 & 6: Flower and stripes using dual-ended magnet pen |
For the stripes (pattern 6), I moved it very slowly once down the nail. The flower (pattern 5) on the opposite side of the pen tool just needs to be held in position for 30 seconds once before lifting directly upwards so the design doesn't move on nail surface. For whatever reason the smaller magnet doesn't need to be renagnetised after design or top coat and still holds the pattern, I am not sure why.
P.S. The polishes used in this post are magnetic multichromes from Tonic Polish - Here comes the Sun and Drag Race if anyone is wondering!
If you have any questions or points that you are wondering about, feel free to drop a comment and I'll respond to the best of my abilities. Good luck!
thank you so much for all of these tips !!! I didnt know I had to hold the magnet at least 60 seconds nor thought of shaking the bottle if it was sitting for more than 5 min!!! your designs are amazing :) thanks for sharing !
ReplyDeleteThank you for the kind words Chris, happy for others to get their magnet fun on!
DeleteStupid question alert: With the striping using the dual ended magnet pen, you moved the pen up and down the nail right? Did you keep moving it for 60 seconds?
ReplyDeleteNot a stupid question at all, I don't think there is such a thing! I moved it very slowly once down the nail. The flower one on the opposite side of the tool just neefs to be held in position for 30 seconds once before lifting directly upwards so it doesn't move on nail surface. For whatever reason the smaller magnet doesn't need to be renagnetised after design or top coat and still holds the pattern, I am not sure why. Thanks for pointing out I didn't add that info in, I shall do so now. Thanks Sherri!
DeleteThanks for all your tips! I've been having trouble with magnetics, no matter what tips I've gotten. I do have very curved nails. Can you tell me where to purchase a dual ended magnet pen? Thank you again!!
ReplyDeleteYes I can! It was a link in the post but not very obvious: https://www.aliexpress.com/item/WKEFULNESS-Flower-Strip-Pattern-Dual-ended-Magnet-Pen-Cat-Eye-3D-Magnetic-Stick-for-UV-Gel/32873445847.html?spm=a2g0s.9042311.0.0.27424c4d5EIcYG
DeleteThat link is where I purchased mine.
If you search "magnet nail pen" or "magnet nail pen flower" on ebay or aliexpress there will be lots of them too! :)
Shauna - do you have an email address where I can reach you? I was curious if I could possibly add the link to this tutorial to a card for customers who purchase my magnetic polish from October's PPU? This tutorial is amazing. I haven't been able to get magnetic polishes to work for me before until I used your tips and tricks! If you would be cool with that, could you please email me at beglsales@gmail.com? Thank you so much!!
ReplyDeleteYes! I just sent you an email :)
DeleteHi, Shauna! I’d like to link your tutorial in listings for my new magnetic polishes coming out soon. Feel free to email me at pam@stellachroma.com if you’d like!
ReplyDeleteI'm looking for magnetic polish that does not require a UV light. I went to the link in your post but it states taking a break. Does the polish require UV?
ReplyDelete