Tuesday, September 22, 2020

Grace-full Autumnal Pruglies Collection Part 2

This is part 2 of the Grace-full Autumnal Pruglies collection. You can view part 1 here


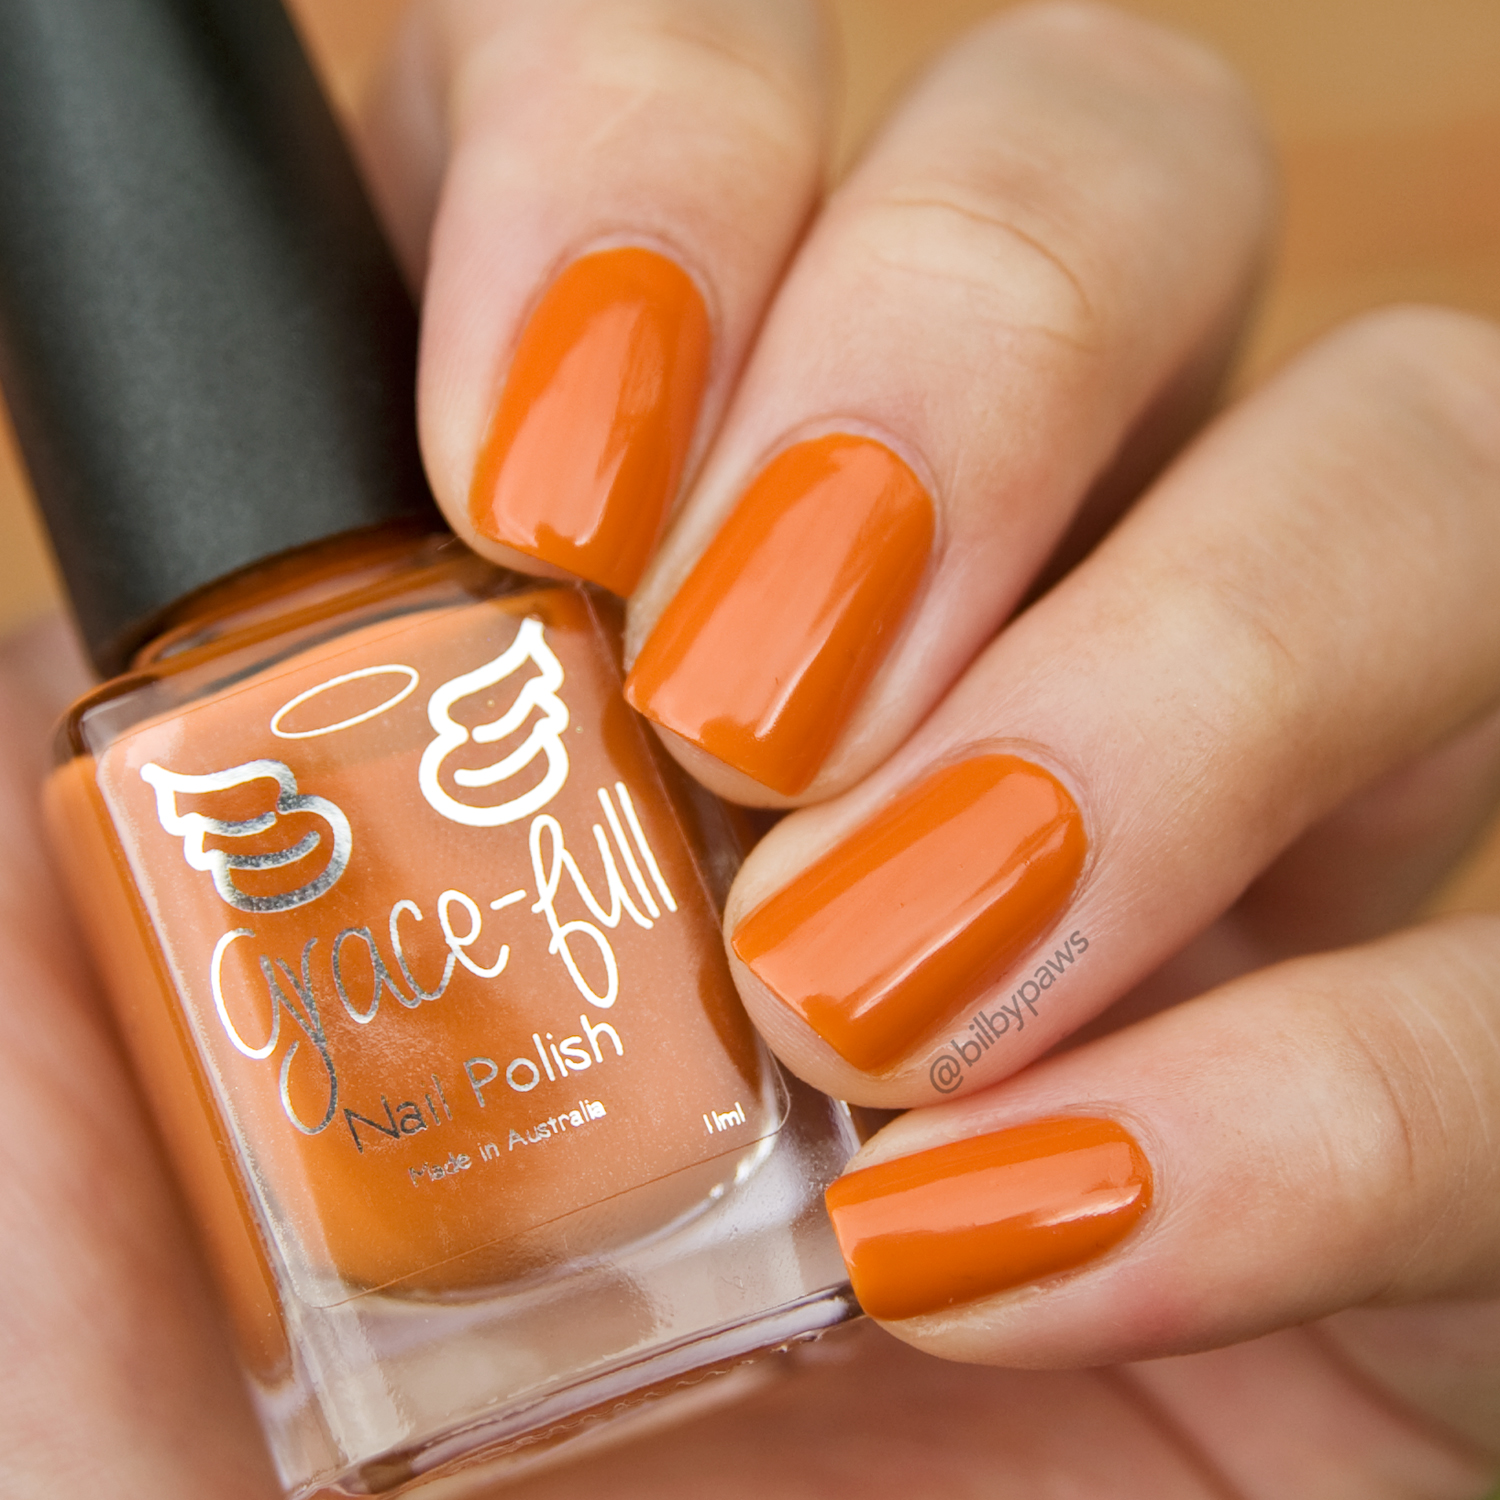
'Appily Ever After - described as "a tri thermal that is brown/deep red at it’s coldest, and a chartreuse green as its warm colour". 

I used 3 thin coats of this thermal creme. Inbetween the thermal changes are gorgeous shades apples usually comes in - notably blush to Indian red. A super fun and sensitive transition. 


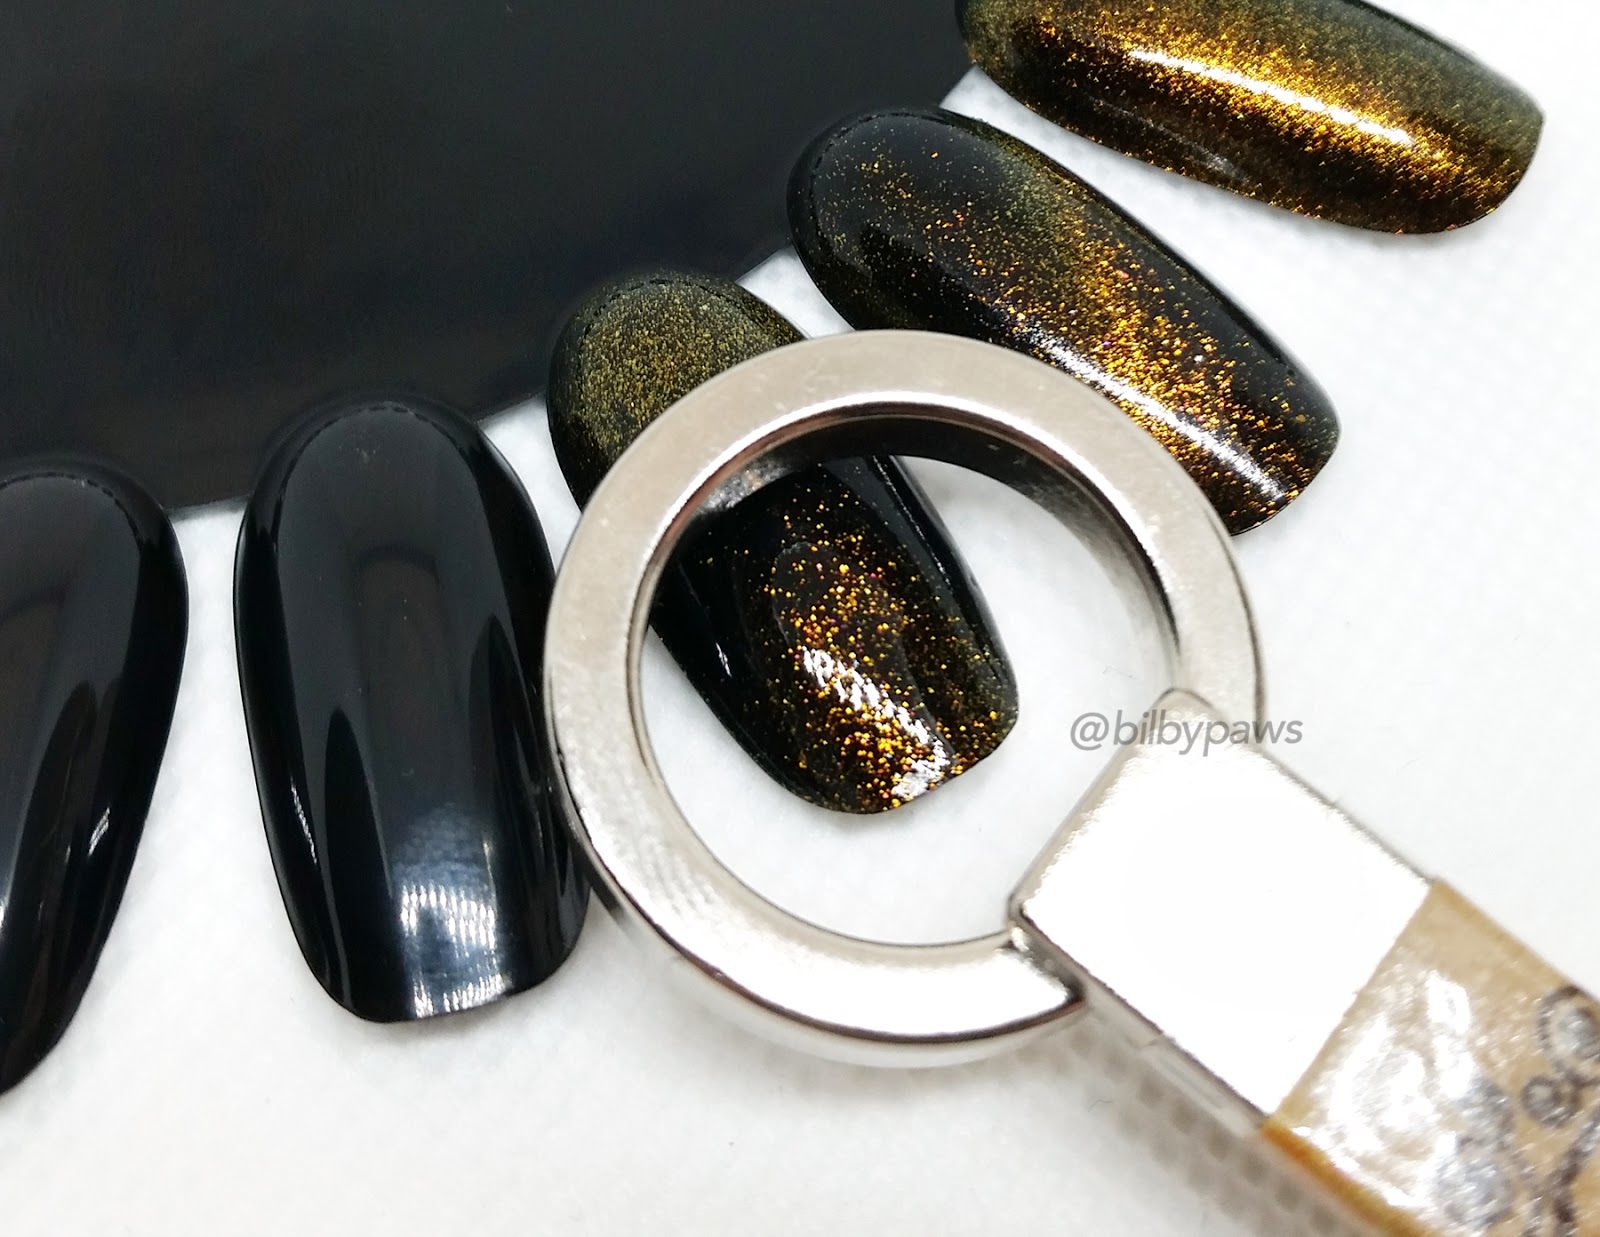
Evergreen Envy - described as "a jelly teal coloured base with a smattering of holo flakes". 2 coats of this deep pine green jelly filled with silver holo flakies. Formula is smooth and easy as per usual, easy to apply and has a deep glow IRL that doesn't translate to camera. Does stain slightly so use a base coat.


Garnet Wine - "not a crème and not a jelly this falls somewhere in between. In a deep maroon, it’s a plain colour and very vampy and rich in colour". 

3 thin coats or 2 coats with a thicker second coat to float over the first. A dark, vampy garnet that builds up to a glossy chocolate-tone. If polish touches the sidewalls of your nails it is hard to remove due to how pigmented this polish is so be careful with application.  


Pumpkin or Another - described as "a dirty pumpkin colour creme". 

2 coats of this delicious orange squishy creme. Grace-full always does nice cremes and this is no exception - this is my favourite polish from this half of the collection. It's the perfect base for autumn / Halloween nail art or just to wear matte! 


The collection releases on 26th September at 8pm AEST. 

You can follow more updates and view more swatches in their Facebook fan group

Grace-full Autumnal Pruglies Collection Part 1

This is my first half of the Grace-full Autumn Collection that I collaborated on with Theresa when I won a fan group contest! You can view part 2 here.

I'm very excited to show you all my swatches. Unless otherwise mentioned all my swatches use one layer of Hit the Bottle's 'Varnish Without a Trace' top coat.


Autumn Prism - described as 'an aurora shimmer that moves through tones of red, green and gold'. I used 2 easy coats that built up easily with no patchiness. To me it's a 'rusty' take on the traditional red to green multichrome. In direct light it looks like a glowy brick red. 


Be-leaf in Magic - described as "a forest green crelly base with ultra chrome chameleon flakes in red/gold".

I applied this in 3 thin coats, letting each layer dry (which it did quickly) before applying the next, building up to a dark green shade with red / gold / green multichrome flakes that mimics the shades of autumn leaf shed. The polish was mostly smooth with 1 layer of top coat, though it was slightly textured in spots over larger flakes.


Finally on Taupe - "a taupe base with an orange aurora shimmer flash". 

A beautiful grey/greige/taupe crelly with orange shimmer that built up on 2 thin coats. At extreme angles the shimmer shifts green. Would suit a large variety, if not all, skintones.


Mustard the Courage - described as "a mustard colour linear holo". Last but not least, my favourite polish from this half of the collection. I had to put it next to some of my favourite yellow cushions from IKEA, which really helped to show what sets this polish apart in terms of shade. 

2 thin easy coats: first coat was a marigold yellow, thin but not streaky; second coat built to opacity. Result is a burnished, slightly brassier tone that leans more green/gold than orange in shade. In direct light a linear holo is visible. A very unique colour I'd love to see on other skin tones!


The collection releases on 26th September at 8pm AEST. 

You can follow more updates and view more swatches in their Facebook fan group


Friday, August 10, 2018

Emily de Molly August Collection (Part 2 of 2) - Swatch & Review

Part 2 of my swatch and review of the Emily de Molly August Collection. I have broken up the post into 2 parts because of the picture-heavy nature of swatches. This post contains the polishes Right of PassageSubdued Delights, and The Maze and the Hightower.

Part 1 with Ashes From FlamesDancing Through SundayMemories of Midnight, and Positive Contact can be viewed here. 


Emily de Molly August Collection (Part 1 of 2) - Swatch & Review

I was asked by the lovely Hayley of Emily de Molly to swatch the August 2018 7-piece collection.

The collection is a varied mix, with polishes ranging from thermals, magnetics, holos, and flakies... What they have in common is that they are all stunning, and as always, apply perfectly with a  2-coat formula.

I am breaking up the post into 2 parts because of the picture-heavy nature of swatches! This post will contain: Ashes From Flames, Dancing Through Sunday, Memories of Midnight, and Positive Contact.

Part 2 will cover Right of Passage, Subdued Delights, and The Maze and the Hightower. You can view it here. 


Tuesday, July 24, 2018

Polish Pickup Aug 2018 / You Have No Power Over Me from MckFresh Nail Attire - Swatch & Review


Mckfresh Nail Attire have drawn upon the film 'Labyrinth' (which was inspiration of their inaugural collection way back when!) for this month's Polish Pickup theme of Musicals and created You Have No Power Over Me! Purchase information will be at the bottom of the post.

All 3 states of 'You Have No Power Over Me' in natural direct sunlight

Kate has drawn inspiration from this movie still and if you've ever seen this Bowie / Connelly 80s classic I think you will agree with me about it being bang on!

Still from the movie 'Labyrinth' / MckFresh's inspiration image

Sunday, July 22, 2018

How to use Magnetic Nail Polishes - Tips & Tricks / a TIWSHTME post

A new TIWSHTME post, magnetic polish edition! If you're wondering what that appalling mouthful is, it is my acronym and tag for 'Things I Wish Someone Had Told Me Earlier', aka when I do a post compiling tips on how I approach a certain nail-related action that took me a while to learn. Basically a how-to guide, with things often not mentioned in tutorials. Here we go.


...about using magnetic polishes


How-to / Tutorial
  1. Find the strongest point of your magnet. Mark that end using a permanent marker so it is easy to find. Patterned magnets usually have a marked area to be used already. This can be done by applying your magnetic polish on a swatch stick and rotating your magnet ends / poles to see what reacts the most strongly. The pattern created by the magnet depends on the axis (direction) it has been magnetised.

    Bar magnet from Tonic with strongest spot marked in blue

    My ring magnet creates a cool circle shape when I hold the flat side parallel to a magnetic surface.
  2. Ring magnet with flat surface marked in blue
    Pattern created with ring magnet (blue lines mark magnet position) on polish bottle

  3. Shake your polish! If it has been sitting longer than 5 minutes, shake it again. It helps the magnetic particles to spread evenly through the bottle.
  4. Apply thin layer. Cap your nail tip with polish. Let dry fully. An alternative to this is putting down a a black creme polish and letting it dry fully.
  5. Shake bottle. Apply thicker layer evenly, making sure there are no streaks on surface. This time you do not need to cap the tip - this should help with the streaks. This step should be done as quickly as possible. If the polish needs clean up, save it for later. You are trying to manipulate the magnetic particles in the polish before it dries.


    Holding bar magnet diagonally across nail length on swatch wheel
  6. Hold marked magnet point 8mm - 15mm parallel from nail surface for 60 seconds in your position of choice. You may wriggle magnet slightly around the surface of your nail  if you have a strong C-curve so the magnetic pull is distributed evenly.

    Ring magnet tool with 'handle' created from 2 bar magnets snapped together in use over swatch wheel

    Side view of ring magnet tool. Coloured markings on bar magnets are strongest pull point.
  7. Wait until polish is mostly dry. You can go back at intervals to repeat step 4 (for 10 seconds instead of 60 seconds) to coax back any drifting particles into place.
  8. Apply a quick dry top coat and repeat step 4 (and 5 if needed). Until polish is completely dry, which can take a few hours, the magnetic particles might continue to drift. A thin first layer and allowing polish to dry as well as possible before top coat helps to aid total dry time.
  9. Clean up!


Miscellaneous Tips

  • If you want to apply a topper like a scattered holo, I suggest waiting until polish is completely dry to do so. Each time you apply a new layer of polish, the solvent in the polish 'melts' the polish below, so when you use a magnetic polish the particles move. This is why I use a magnet after top coat. When a polish is completely dry it is less likely to be affected by a new polish layer.

  • Apply polish in steps 4 & 5 one finger at a time. This ensures you have enough time to magnetise each nail properly.

  • If you screw up, let polish dry fully and add a new coat and try again. An extra coat can be easier than starting over and getting little sparkle bits everywhere.

  • You can tell when a magnetic polish is fully dry when the particles look finer and more dull. The polish surface looks flatter rather than 3d.

  • You can use a third hand / soldering tool to position your magnets so you don't have to hold them. Personally I keep knocking into the magnets this way as I have shaky hands, but it works for other people. 
  • After you have mastered the basics, instead of a first layer of polish or a black creme base you can add any other polish (cremes work best) colour to produce a different final effect. Colours that either contrast or complement the magnetic particle colour work best here. I particularly like using Tonic's Happy Beginnings which is a blue squishy creme. 


Different magnets, different shapes
Here are some of the patterns created by different magnets.


Pattern 1: Bar magnet diagonally over the tip of nail
Pattern 2: Ring magnet over the tip of nail
Pattern 3: The round end of double-sided magnet
Pattern 4: Wavy lines using patterned nail magnet (#4)
Pattern 5: Flower using dual-ended magnet pen
Pattern 4: Wavy lines using patterned nail magnet (#4)
Pattern 5 & 6: Flower and stripes using dual-ended magnet pen

For the stripes (pattern 6), I moved it very slowly once down the nail. The flower (pattern 5) on the opposite side of the pen tool just needs to be held in position for 30 seconds once before lifting directly upwards so the design doesn't move on nail surface. For whatever reason the smaller magnet doesn't need to be renagnetised after design or top coat and still holds the pattern, I am not sure why. 

P.S. The polishes used in this post are magnetic multichromes from Tonic Polish - Here comes the Sun and Drag Race if anyone is wondering!

If you have any questions or points that you are wondering about, feel free to drop a comment and I'll respond to the best of my abilities. Good luck!